My Very Groovy Bathroom Curtains + Half-Triangle Sewing Technique
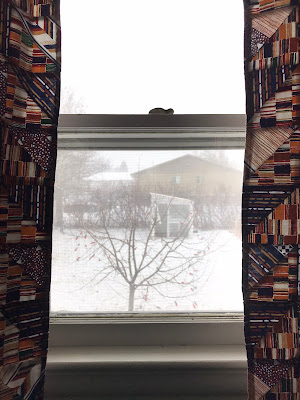
With help from my mama, I recently completed some incredibly groovy bathroom curtains. They're so much cooler than I thought they'd be when I started dreaming up this project. It is crazy. I love 'em. They rock. Matt and I are both quite taken with them actually. They're infinitely cooler than the valance-and-blinds that have hung there since we moved in. This is yet another example of our disinclination towards redecorating and home improvement.
 |
| Backlit by the sun I think they look especially fabulous. |
I was excited to make use of some more fabric that I've had "forever." It was a remnant someone gave me. It had a decent amount of length, but was only a foot wide. This proved limitingly narrow for a garment maker like me. I loved the print and the colors, but was stumped at how to use it. That is, until I started dabbling in more patchwork recently. I could see a lot of potential there.
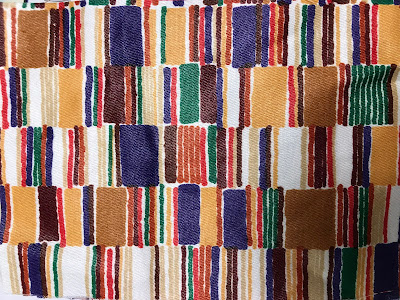 |
| Fabric A. I thought the print looked sort of like the gene sequencing images I'd seen in science periodicals. Hannah said it reminded her of books--which I can totally see now that she mentioned it-- and seems a more obvious association. One I'm surprised I didn't make myself. |
I then found two coordinating prints--Fabric B & C--that had a similar weight and color scheme. These are both fabrics that have been around the block. My mom gave me yards and yards of it early on in my sewing career. I have used it to make a vest, a dress, and a sofa cover. In fact, some of that sofa cover got incorporated into these curtains. It ended up back in my stash when we finally had to retire the trusty ol' leather sofa*. I used up almost every bit of Fabric B, but there is still a lot of Fabric C (i.e. the sofa cover) left for another project. It is like the Energizer Bunny of fabrics--going and going and going...


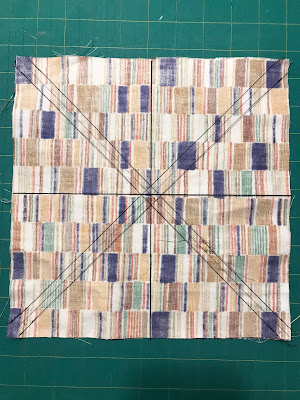 |
| Place two squares of fabric right sides together (RST) matching the raw edges. Draw diagonal lines from corner to corner making an X. Using a ruler, draw stitch lines 1/4 inch to each side of the diagonal lines. Stitch along those lines, making a double X, with the original diagonal lines centered between the stitch lines. Using a ruler, draw a vertical line and a horizonal line across the square, intersecting at the center. There should be a tiny box formed by the stitching lines at the very center that can be used as a guide for these vertical and horizontal lines. [pictured above] |
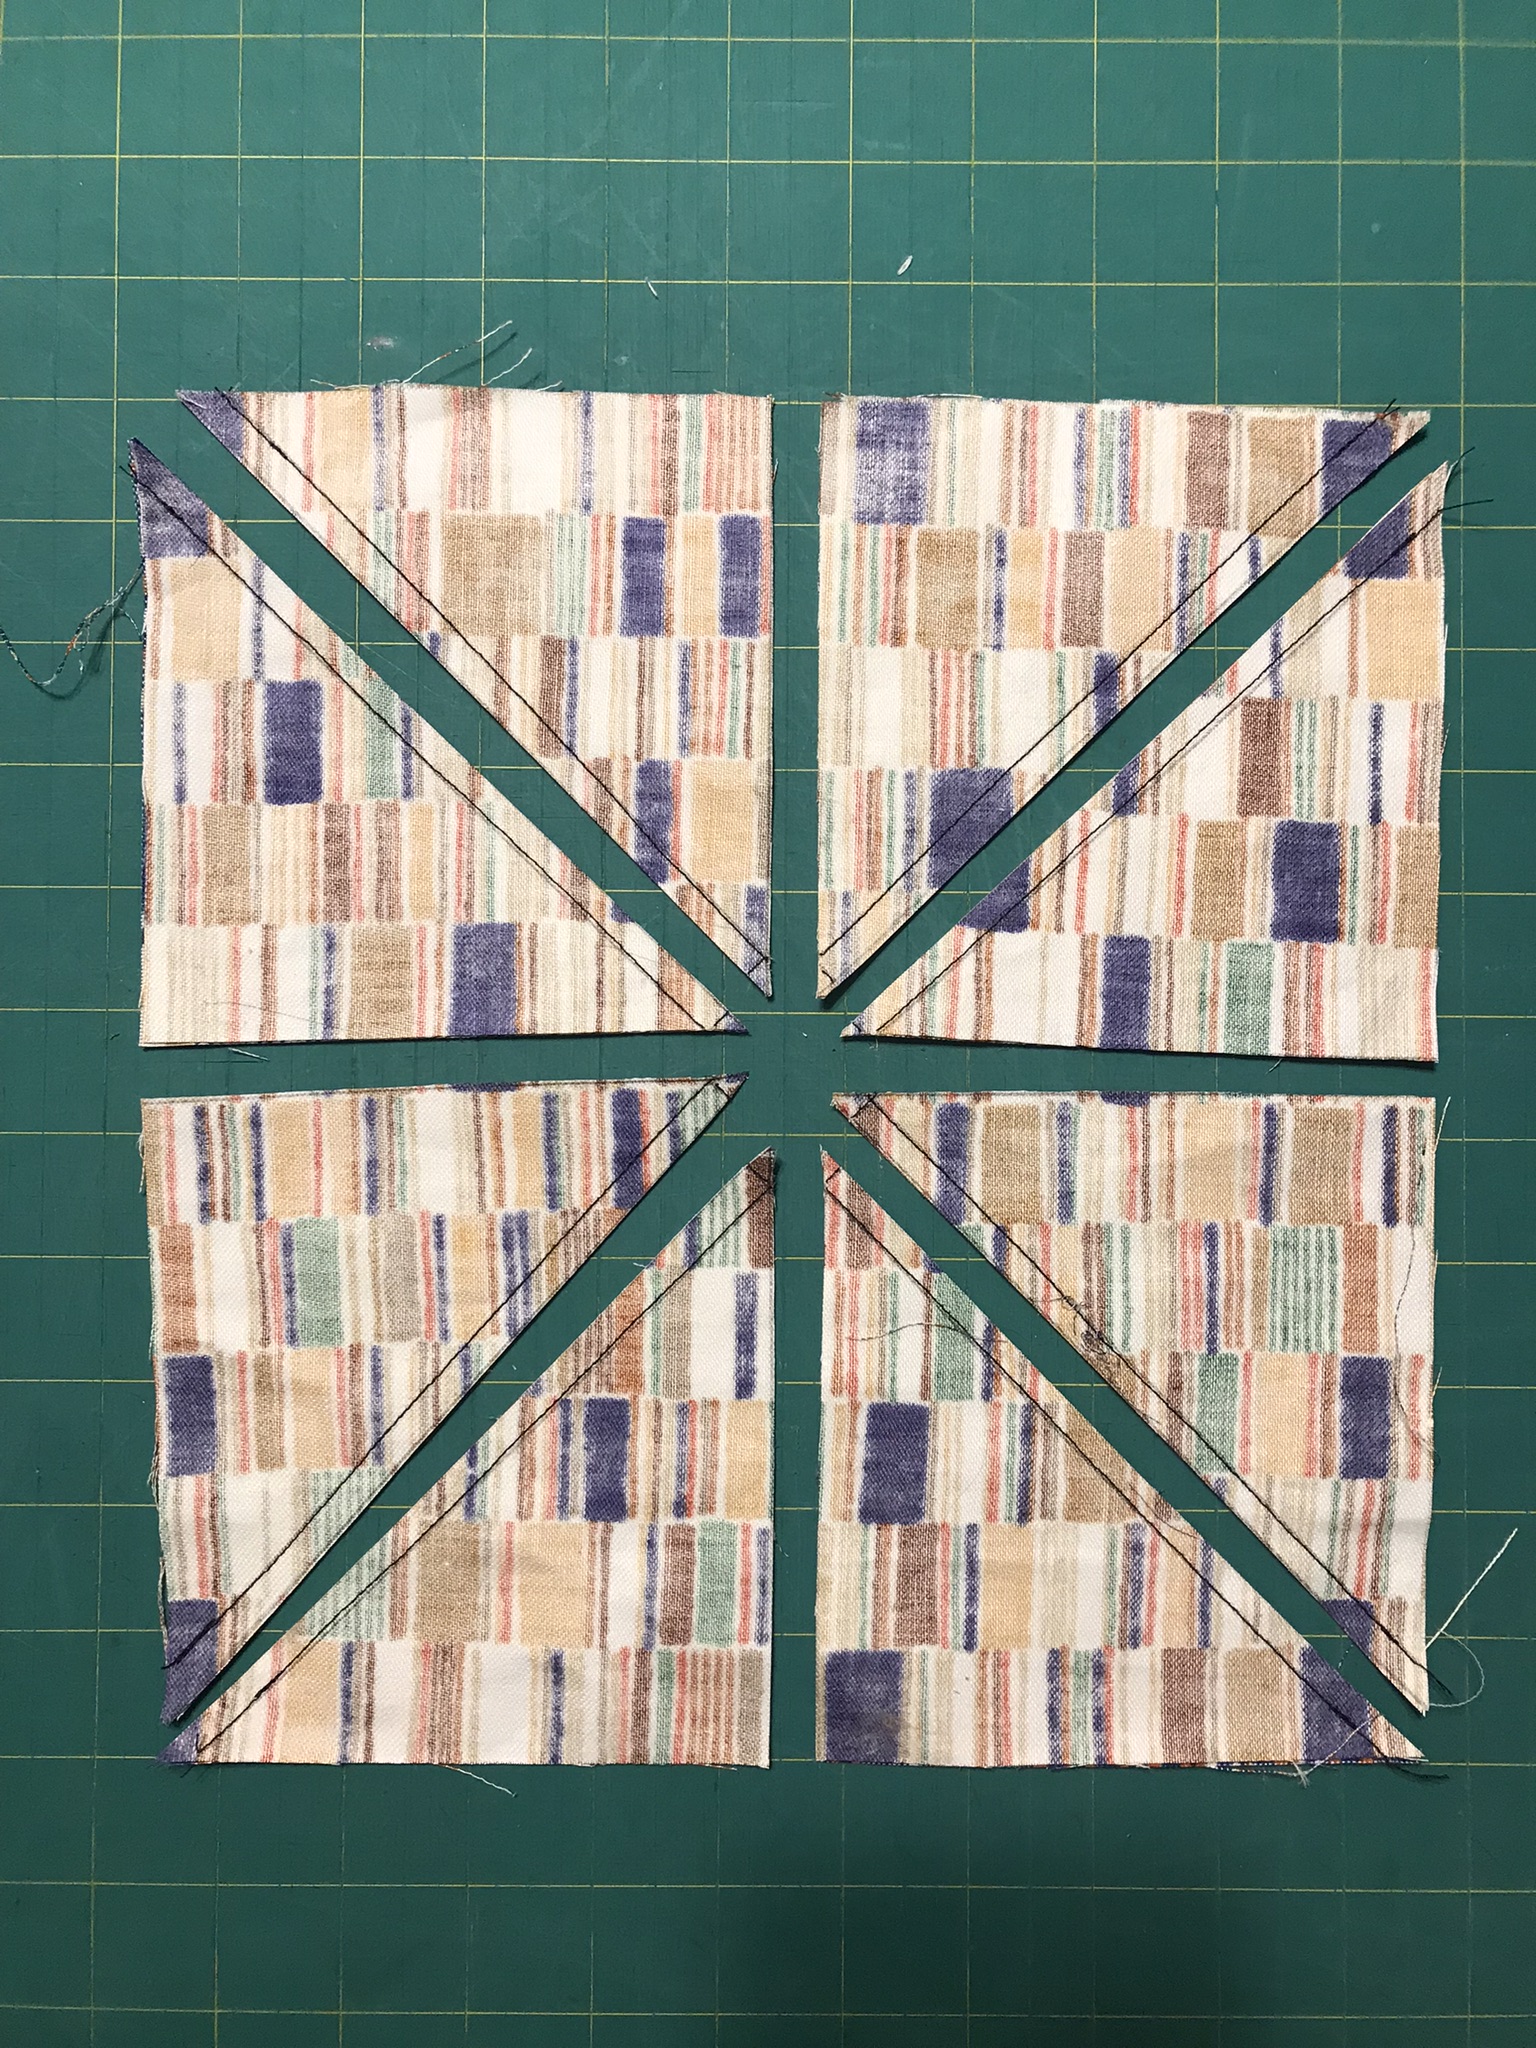 |
| Using a rotary cutter, slice along the original diagonal lines and the vertical and horizonal lines separating the big square into triangle units. [pictured above] |
 |
| Using an iron, press each unit open. [pictured above] Repeat the whole process until the desired number of triangle units has been achieved. To determine how big of a square to start with there was a little math equation. Take the desired finished size, double it, and then add 1.75 inches. In this case, my 4-inch triangle units started with 9.75 inch squares. 4 inches x 2 inches + 1.75 inches = 9.75 inches |

*And by "retire" I mean Matt took a saw and sledgehammer to it in the winter of 2020-21. The individual components were recycled and/or thrown away as was appropriate. He swears this was easier and faster than going to borrow his dad's truck, lugging the sofa up out of the basement, hauling it to the landfill, and then returning the truck to his dad. Plus the metal parts got recycled this way. That couch really did have a good run.

Very nice! And great tip about the half triangles!
ReplyDeleteThanks, Laurie!
DeleteThese are WONDERFUL. The magic of patchwork! Your fabrics are genius together and that stained-glass effect in the window is so pretty. I tried to do half-square triangles one time with no instructions/tricks and whew, they were pretty bad. Your tutorial looks much better - I will keep it in mind!
ReplyDeleteThanks, Margo. It really does feel like magic! I'd started cutting the triangle individually (well, cutting squares and then cutting them in half) and then Matt suggested I wait and ask my mom is she had any tricks up her sleeve that would speed it along. Hooray! She SURE did!
DeleteHi Beth,
ReplyDelete...GROOVY is just the word I'd use to describe those awesome curtains too...well done!
~Have a lovely day!
:) Thanks!
Delete